I've written before about how budgeting as done by older versions of Quicken falls somewhere between less than useful and misleading. I knew that Quicken Essentials for Mac wouldn't implement envelope budgeting. So, while I'm dubious about its utility, we're aiming for completeness here, so I figured I should give QEM's budgeting a whirl.
Wednesday, March 31, 2010
Tuesday, March 30, 2010
Downloading and Matching Transactions
In my first looks, Quicken Essentials for Mac does a good job of downloading transactions and matching those transactions to ones that I've entered myself. There are problems with manual matching and unmatching of transactions.
First, a couple of screenshots. Before downloading -- the two top transactions were previously downloaded, and the rest are ones that I entered manually:

After downloading -- blue dots next to the ones that were downloaded and matched. Notice that there's a Safeway transaction that wasn't downloaded; my bank is still listing it as a pending transaction.

The downloading and matching was all accomplished by choosing Update from the Accounts menu (or by using the Update toolbar button), and was fully automated -- no confirmation of matches involved.
Manual Matching and Unmatching
One of the annoyances with older versions of Quicken is that the matching of downloaded transactions would fail:
- I found that it would sometimes mismatch transactions of the same amount -- if I took out $20 in cash, and went to the store and spent $20, it would sometimes swap the two transactions.
- If I had two transactions to the same payee with the same amount, but at different points in time, and only one had cleared, it would match the later transaction instead of the earlier one.
So, I'm naturally distrustful of matching transactions. How do I know it's matched against the right transactions? What if QEM makes a mistake? Can you manually match or unmatch a transaction? Let's take each of these in turn.
Scheduled Transactions - Tips and Annoyances
Tips
You have many choices on repeatability:
- Weekly (or every 2, 3, 4, etc. weeks, with a shortcut for 2 and 4 weeks)
- Monthly (or every 2, 3, 4, etc. months, with a shortcut for quarterly)
- Yearly (or every 2, 3, 4, etc. years)
- Twice a month (e.g., the 1st and 15th)
- A special repeatability for estimated taxes (the 15th of January, April, June, and September)
Scheduled transactions can end after a certain number of repetitions, on a certain date, or continue in perpetuity.
Annoyances
One thing that's missing from scheduled transactions that existed in previous versions of Quicken is the ability to indicate whether a scheduled transaction:
- Doesn't vary, and should be automatically entered
- Doesn't vary, but shouldn't be entered automatically
- Varies, and needs reminding a certain number of days in advance.

This annoyance manifests itself in how scheduled transactions actually get entered. As I mentioned in my previous post, upcoming scheduled transactions appear in the appropriate register. When the day for a scheduled transaction comes, however, nothing really happens -- the scheduled transaction is still in the register, and you have to take action to have it get entered.
 Specifically, you need to use the "Mark as Paid"/"Mark as Deposited" toolbar button (or action under the Transactions menu). When you do, the transaction is updated, but with the specific amount that you used when you first set up the scheduled transaction (acting like all scheduled transactions should be treated like #2 above). This is annoying, since many of my scheduled transactions do vary.
Getting Started - Scheduled Transactions
When you start from scratch with Quicken Essentials for Mac, the application sets up three tasks for you:
I've covered account setup in a previous post. Let's look at scheduled transactions!
- See Where you Money Goes (setting up accounts)
- Stay on Top of Monthly Bills (scheduled transactions)
- Set Goals to Save Money (budgets)
I've covered account setup in a previous post. Let's look at scheduled transactions!
Monday, March 29, 2010
Useless Spending Cloud
One of the gripes about Quicken Essentials for Mac is that there are fewer reporting options available. The QEM team did find time to put in a "spending cloud"
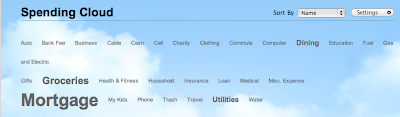

The deal with the cloud is that it shows you where you're spending your money, using font sizes to show relative amounts. The idea of a tag cloud isn't new, but this seems pretty useless to me. Yes, our mortgage dwarfs the rest of our spending. Not much insight there.
What's worse is that it seems like QEM is double-counting some of the categories. I've got my Utilities category subdivided into areas like Water, Gas and Electric, and Phone. Looking at the cloud, there's a slightly larger label for Utilities, but there's also labels for the subcategories as well.
Instead of spending time on the spending cloud, it would be nice if the QEM team would figure out something like the spending comparison report.
Sunday, March 28, 2010
Customizing Categories; Creating Subcategories
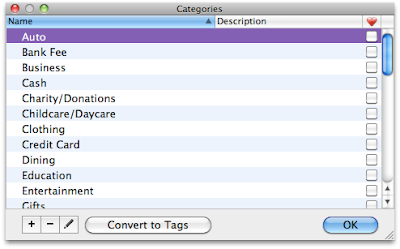
Quicken Essentials for Mac comes with a standard set of categories, but you'll want to customize them. Use the Window menu to pull up the Categories window, then click the Edit button in the lower-right corner to switch to editing mode:
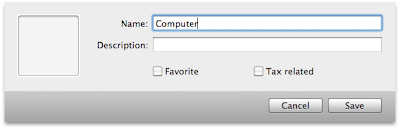

The little plus and minus buttons do just what you'd expect - add and delete categories. Adding is simple enough:

Deleting is also easy, and there's a warning message if you try to delete a category that's in use by one or more of your transactions.
One thing I like to do is to create subcategories. While I don't go bonkers, I do like separating some categories into different parts. For example, I like putting gas for the car, car maintenance, and car registration fees all under "Auto". There's two ways to do this in QEM:
Working with Categories
As you can see from the last couple of posts, I started my testing of Quicken Essentials for Mac by starting from scratch, rather than importing my Quicken 2006 file. I'll get to that later.


Assigning a category to those two USPS transactions is simple enough: double-click on the category column for that transaction and you go into edit mode:

You can then either click on one of the categories, or start typing to narrow down the list:


Starting from scratch, QEM downloaded about three months worth of transactions. One of the things that it did was to assign categories to most of the transactions:
As you can see, it did an okay job. It correctly categorized the two Dining transactions, and figured out that Trader Joe's is a grocery store. It didn't know what to do with the post office transactions, and said that the Amazon purchase was a gift when it wasn't.
QEM comes with a starter set of categories:


You can then either click on one of the categories, or start typing to narrow down the list:

Hit return to finish:

Okay, two things to be careful about:
- I like typing. When the shortened lists of categories came up, like you see two pictures up, I wanted to be able to use arrow keys to pick a different category. I first tried using the right arrow key, since the categories are laid out in a grid, but that didn't work. You need to use the up and down arrow keys to cycle through. While this is just like how Quicken 2006 works, it was unexpected -- hitting the down arrow key to move right is weird.
- QEM will not warn you before creating a new category based on what you type:

Viewing Transactions in QEM
The most obvious change in Quicken Essentials for Mac is in the interface you use for looking at transactions. Gone is the checkbook metaphor - transactions are now in a pretty standard-looking table view:

This table view works just like other table views on the Mac:
- Click on a column header to sort by that header
- Drag a border in a column header to resize that column
The view shown above has the default column settings. Use the View menu or the little gear icon just over the scroll bar to select the columns you wish to view:


There's also a very Mac-like search box you can use to narrow down your transactions:

On the left-hand side of the table view is a sidebar (QEM calls it a source list) that's also a familiar Mac-like metaphor - use it to select different views of your data:

Overall, I'm not too sure how I feel about this new interface. The checkbook visual metaphor is one that Quicken had from the beginning, and it was a classic solution to a design problem - make the interface match what people were doing on paper, so that people would feel comfortable with it (and excited that the computer would do the math for you). Breaking away from this metaphor is going to be hard to adapt to.
(On the other hand, from a programming standpoint using standard Cocoa table views is a huge advantage. Huge. You don't have to write any code to do sorting by columns, you write just a view lines of code to do the neat search box, getting the different types of columns is pretty much a snap)
As a user, one advantage of this new interface is that it does reduce window clutter. Using Quicken 2006 I would often find myself with 4-5 windows open (checking account, savings account, bills, the overview screen).
Setting Up an Account in Quicken Essentials for Mac
The first thing you'll need to do after installing Quicken Essentials for Mac is set up a new account. QEM walks you through it, but the workflow is a little hurky.
QEM really wants you to use online banking features -- the first thing you'll be prompted to do is find your bank:
 QEM's list of banks has the familiar Mac search box. Type in the first few letters to find your bank:
Then, oddly, rather than entering your login information for your bank, you're prompted to create an account at Intuit:
 I already had an Intuit account from when I used to use TurboTax online, so I clicked on the (very tiny) link in the bottom right to indicate that I already had an Intuit login. I was then prompted to log in:
 and verify my email and postal addresses:
After successfully logging into my Intuit account, I was prompted to log into my bank:

It then asked me which of my accounts I wanted to add. I could also give them names and identify the types of accounts (checking, savings, mortgage):

And that's it!
Overall, the process was fairly straightforward. The only suggesting I'd make to the QEM people is that the order is off -- rather than asking for Intuit account information between asking to identify my bank and asking for my bank login information, ask for that all at once (at the beginning), then get my bank info.
Thursday, March 11, 2010
Quicken Essentials for Mac Installation
Installation of Quicken Essentials for Mac was very straightforward. Upon inserting the CD, the following window appears:
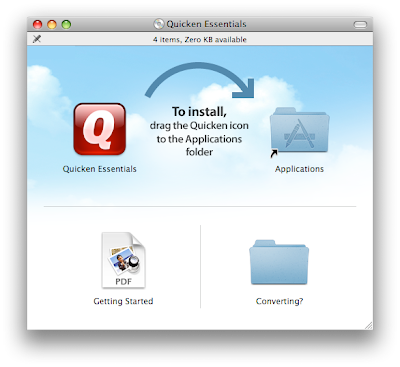 As with many Mac applications, installation simply consists of dragging the application to your Applications folder (and the CD provides a handy shortcut).
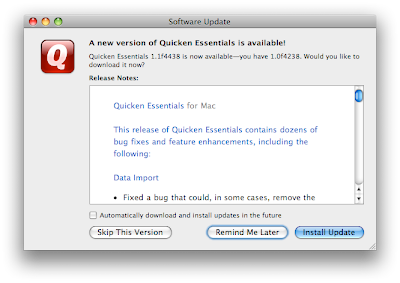
After installation I launched QEM, and was immediately encouraged to update the software from version 1.0f4238 to 1.1f4438 (gotta love those version numbers). Downloading and updating the software was again straightforward:
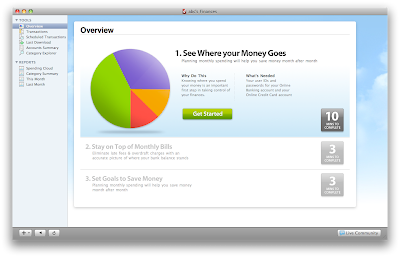
 Once the application updated an re-launched, I was left with the QEM overview screen. Nothing much to see here, since I hadn't set up any accounts or imported any data:
And we're off and running! Score two for Intuit -- installation and the update were very Mac-like. Also, I'll note that at no time was I asked for a serial number.
 As with many Mac applications, installation simply consists of dragging the application to your Applications folder (and the CD provides a handy shortcut).
The "Converting?" folder caught my attention. Inside is an application that those of you using previous versions of Quicken will need to use:
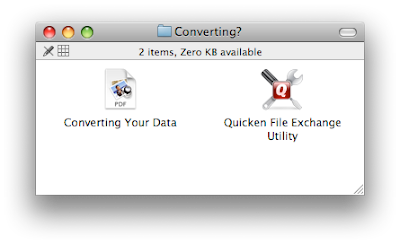 The conversion of your old Quicken data file isn't done in QEM itself, but by this separate Quicken File Exchange Utility. More on that later.
 The conversion of your old Quicken data file isn't done in QEM itself, but by this separate Quicken File Exchange Utility. More on that later.
After installation I launched QEM, and was immediately encouraged to update the software from version 1.0f4238 to 1.1f4438 (gotta love those version numbers). Downloading and updating the software was again straightforward:
 Once the application updated an re-launched, I was left with the QEM overview screen. Nothing much to see here, since I hadn't set up any accounts or imported any data:
And we're off and running! Score two for Intuit -- installation and the update were very Mac-like. Also, I'll note that at no time was I asked for a serial number.
Quicken Essentials for Mac Unboxing
My copy of Quicken Essentials for Mac arrived in the mail the other day. In the spirit of all things Mac, here's an unboxing.
Front:

An inside flap, touting features of the software:

The back of the box, with handy check marks indicating that this software can do at least nine things:

But wait -- the back of the box has some important details!
Detail #1 -- Intuit's 60-day money-back guarantee:


Detail #2 -- a warning that this version of Quicken doesn't do all of the things that you might be used to in a Quicken product:

The inside of the box contains a CD:

And a credit card offer:


On to installation!
Subscribe to:
Posts (Atom)